Installation
Note: You will need an administrator password to complete the installation. As of July 22, 2022, the branding for the campus VPN client has changed from Pulse Secure (9.1rx) to Ivanti Secure Access (22.xRx). All other aspects of the client are the same. Any reference to Pulse Secure should be interpreted as Ivanti Secure Access.
Step 1: Download the Ivanti Secure Access VPN client package for macOS / Mac OS X (UCSB Box credentials are required to access the file).
If you are using a Mac with an M1 or M2 chip, you'll need to install Rosetta2 prior to installing the Ivanti Secure Access client. Without this, your installation will silently fail. You can install Rosetta2 by opening a terminal and inputting the command '/usr/sbin/softwareupdate --install-rosetta'.
More on Rosetta here: https://support.apple.
Step 2: Double-click the installer package to open it. You should see a lock icon in the upper right corner of the install window.
If you receive a warning message from OS X Gatekeeper about not being able to open the package because it was not downloaded from the App Store, you will need to take a few extra steps.
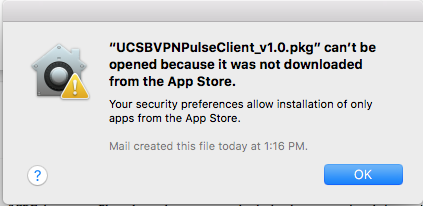
Open System Preferences -> Security & Privacy -> General.
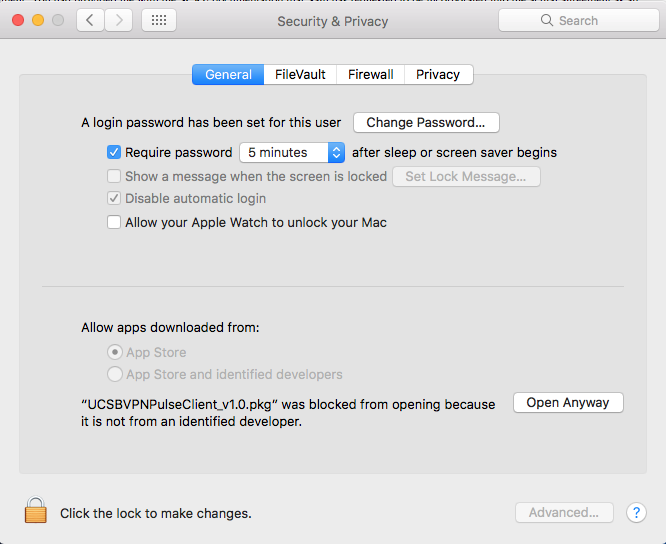
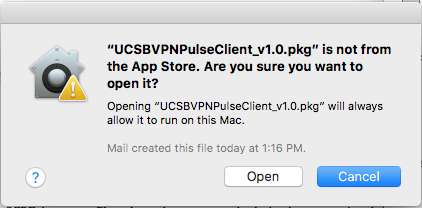
Click the "Open Anyway" button if you don't want to change your system's behavior, but just allow installation for this package. If you wish to change the default behavior, click the lock in the bottom left of the window and enter an administrator password to unlock the System Preferences. Change the button to "App Store and identified developers," click the lock, close System Preferences, then double-click the installer package again to begin the installation. If prompted about the installer package not being from the App Store, click "Open" to continue.
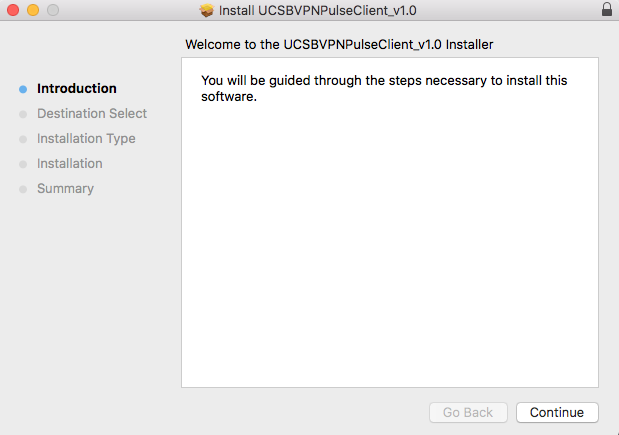
Step 3: Click Continue in the installer window
Step 4: If prompted, select a Destination disk for install and click "Continue"
Step 5: Click Install
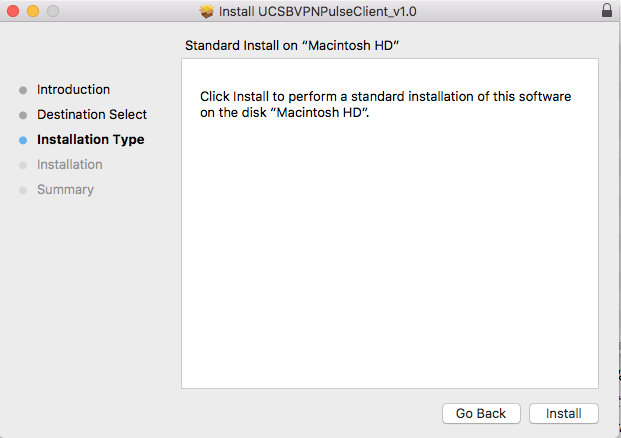
Step 6: Provide a username/password with administrative privilege and click "Install Software."

Step 7: Installation is complete.
Usage
IMPORTANT: you must first have at least one device already enrolled with UCSB's MFA service (Duo Security) in order to connect to VPN.
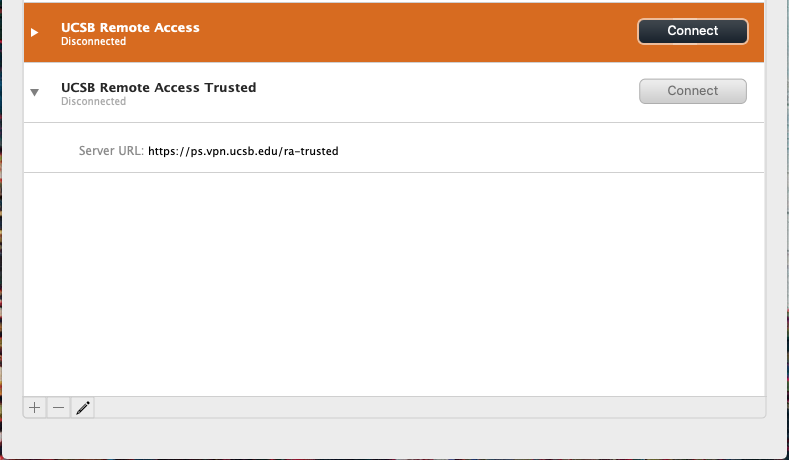
Step 1: Open the Ivanti Secure Access application from the Applications folder. In the Ivanti Secure Access client window, click the Connect button inside the "UCSB Remote Access Trusted" connection profile or from the Ivanti Secure Access icon in the menu bar at the top of your screen.
Step 2: Please read the Pre Sign-in Instructions carefully, and click 'Proceed'.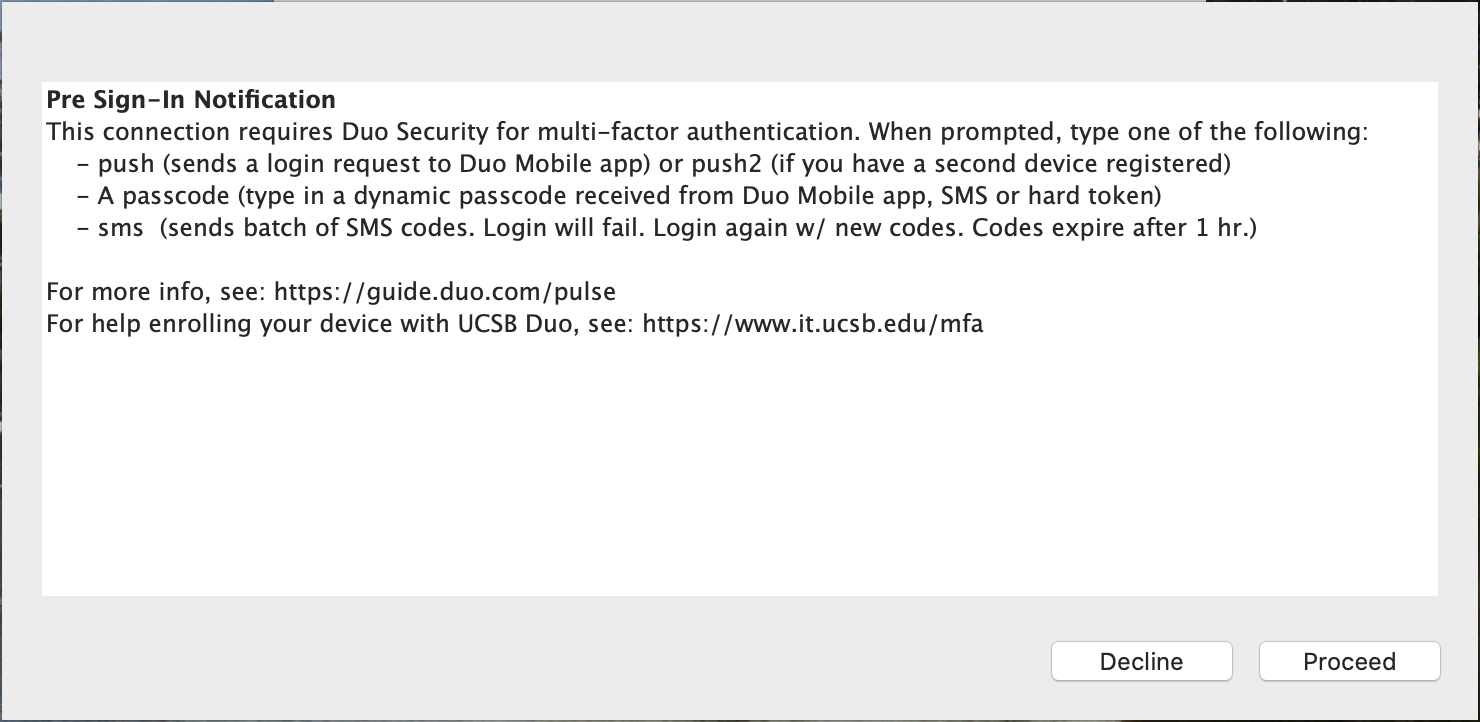
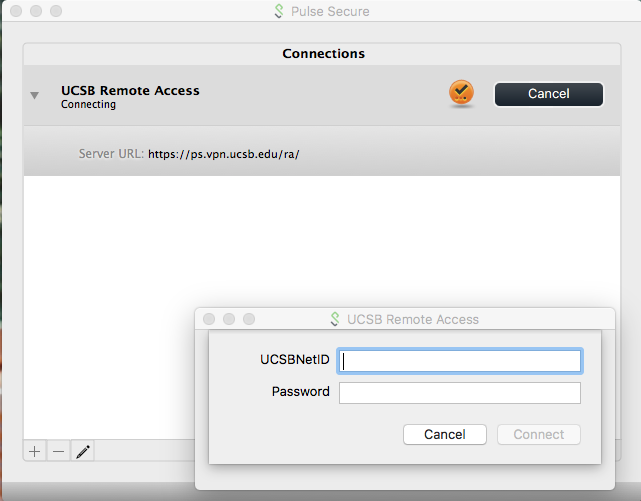
Step 3: A window will open prompting you to enter your UCSBnetID and password. Provide them and click "Connect".
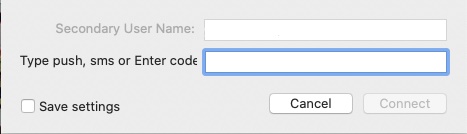
Step 4: Once your credentials have been authenticated, you will be prompted to enter which factor you want to use for multi-factor authentication (MFA).
Please type 'push' (no quotes) in the designated field to get a push notification via the Duo mobile application, or enter a current SMS, Duo, or hard token numerical passcode. Alternatively, you can type 'sms' (no quotes) to receive a new set of codes via SMS message on your phone (login will fail - you will need to authenticate to the VPN again to use the newly received SMS passcodes, which are good for one hour). You have a short period of time after entering this information to approve the Duo push notification or enter your code. Press Connect.
You can find more about the distinctions in Duo device setup here: https://www.it.ucsb.edu/getting-started-mfa-duo/which-devices-should-i-enroll-mfa-duo.
Once you have provided a valid 2nd factor, your client will connect and the button should change to read "Disconnect." Click the arrow on the left to expand the status area - this will show the words "Status: Connected."
Step 5: Verify your VPN connection by using a web browser to visit https://next.noc.ucsb.edu/ip. The web page will display the network address your computer is using. If the VPN is in use, it should say “On-campus address (VPN).”
Step 6: To disconnect from the campus VPN service, click the "Disconnect" button.